Market - Slider Setup
Home Page Slider
This theme uses the Soliloquy Lite plugin, which can be obtained here or by searching in Dashboard>Plugins>Add New.
You do not need to upgrade to the Pro version of this plugin to use it as shown in our demo. However, you are more than welcome to purchase it if you’d like access to more of it’s features.
- Install and activate the plugin.
- Navigate to Soliloquy > Add New.
- Give your new slider a name of Home Slider <case sensitive—very important.

- Click the Config tab and use the settings from the screenshot below.


If you want the slider to be full width all the way across the page, you’ll set your width at 2500px. If you’d like the slider to be the width of your content, you’ll make your width 1200px.
VERY IMPORTANT: You can only have ONE slider file titled "Home Slider."
5. Once configured, you can add your images under the Slider tab.

6. Lastly, you’ll add a Text Widget to the Home Slider Overlay widget area if you’d like to have text over your slider.

This is the code to add a button to the text widget:
NOTES:
- This Slider does not have to include multiple images. You can use several images or just a static image.
- You can choose to add the text overlay widget or not. This is completely up to you.
- If for some reason you aren’t seeing the slider on your home page at this point, it’s because the name of the slider wasn’t set properly to Home Slider. Navigate to Soliloquy>Soliloquy and choose the new slider you created. Click the Misc tab and make sure your settings look like the following:

Blog Page Slider
The Genesis Responsive Slider Plugin can be obtained here or by searching in Dashboard>Plugins>Add New.
- Install and activate the plugin
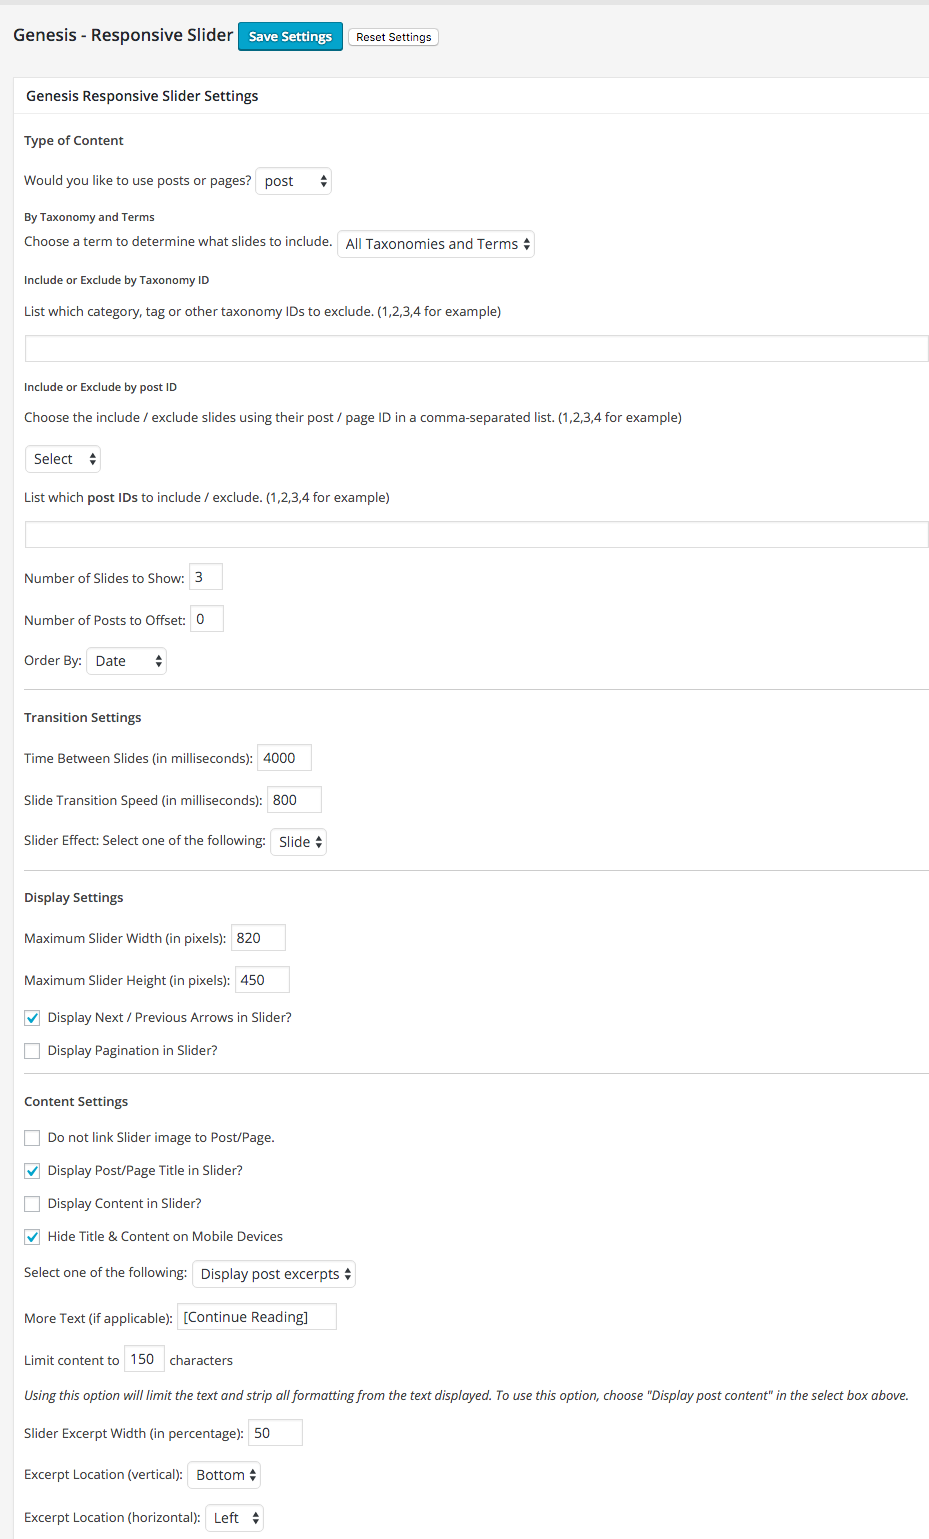
- Configure the slider settings (Dashboard>Genesis>Slider Settings) as shown in the screenshot below.
- Visit Dashboard>Appearance>Widgets and drag a Genesis- Responsive Slider widget to the Above Blog Slider widget area.